When I first moved to Portland from a small town in Northern Minnesota, I felt as though I had traded the stars for neon lights. City living has it's luxuries, but the light pollution from those luxuries has put a damper on my nightly stargazing. These days it's hard to get completely away from the soft orange, yellow, or white glow of a city without going backpacking deep into the woods, but there are a few ideal places for a peaceful evening under the stars that are a bit more accessible.
Please keep in mind that the farther from lights you are, the larger the animals in the woods become. It's incredible how frogs turn into pumas, and how deer transform into grizzly bears in the middle of the night.
Within its 3.4 million acres, 91 percent of which are designated as wilderness, the park produces very little light pollution. But it's the combination of dry climate, clean air, and an expansive horizon that really make this Gold-Certified International Dark Sky Park so special. From November to April, the park offers guided night sky programs as well as full moon hikes over the sand dunes.
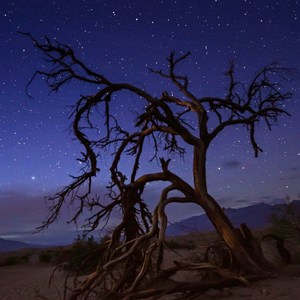
Joshua Tree National Park encompasses 792,510 acres in California’s southern Mojave and Colorado deserts, making it the eighth largest national park in the contiguous United States. The variety of cactus, trees, and rock formations offer interesting and seemingly endless composition opportunities.
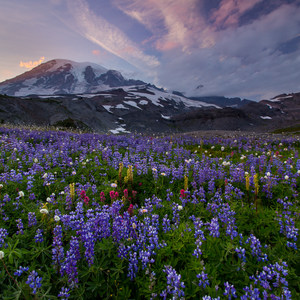
Make your way to the Sunrise parking lot in the summer months and you'll most likely pass a slew of tripods and anxious photographers waiting for the sun to set and the Milky Way to rise. The view from the north looking south to Mount Rainier will give you a good look at the Milky Way over Mount Rainier if the clouds cooperate. Once or twice a summer there are star parties at the Sunrise lot as well. Check the park website for current events and times.
The Kitt Peak National Observatory is open to the public and home to the world's largest collection of optical telescopes. The clear dark skies of the Sonoran Desert are famous for stargazing, and the observatory's mountain top location make site one of the best places to view the night sky in the U.S. Reservations must be made in advance for the evening stargazing programs.
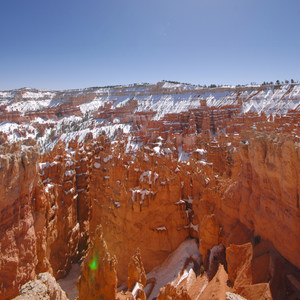
The clean, dry air, high elevation, and lack of light pollution make Bryce Canyon National Park one of America's darkest places. The Milky Way spans the sky like a rainbow, and you can see 7,500 stars on a moonless night. If you'd rather hike under the moon, the park's "Dark Rangers" lead more than 100 astronomy programs every year that include full moon hikes, stargazing with high-powered telescopes, and their Annual Astronomy Festival, which will be held from June 17 through June 20 this year.
Browse the Featured Adventures below for more get destinations.
Beginner Tips for Night Photography
Astrophotography can get quite complicated, but these basic settings give you a place to start if you're looking to experiment. Then practice, practice, practice.
It's best to use lenses with a maximum aperture of f/2.8 or larger.
Mount your camera on a sturdy tripod.
Turn your camera's focus to manual mode and set your lens to infinity focus. Turn off any image stabilization.
Start with the ISO at 2000 and raise it if needed. While trying to compose your image in the dark, you can set a higher ISO to make the surroundings easier to see on your initial images. Once you've framed up your image, drop the ISO back down.
Set the exposure time for between 20 and 30 seconds. (If you're interested you can read more on specific exposure times to avoid star trails or elongated stars based on your lens focal length.)
Set the self-timer for 2 seconds. Setting a timer or using an intervalometer will keep the camera from moving when the shutter is released.
Take your first image.
Test and repeat.
For additional tips, watch the tutorial below from Ben Canales at The Star Trail Photography.
Great article!
One tip -- don't rely on your camera's infinity focus to be the sharpest point for star shots. Infinity is often beyond the sharpest spot and will capture the stars as blobs instead of tiny and crisp points of light.
Instead, turn on "live view" where it is showing the current view through your lens on your camera's LCD screen. Find a bright star or planet and zoom your LCD view in as far as it will go on that bright object. Turn your camera to infinity focus and back off the focus until the star/planet is as sharp as it can get on the LCD screen. Once you find that spot, make a mark on your lens or use tape to make sure your camera stays at the focus point.
Now take the shot!
Have updates, photos, alerts, or just want to leave a comment? Sign In and share them.
Comments
One tip -- don't rely on your camera's infinity focus to be the sharpest point for star shots. Infinity is often beyond the sharpest spot and will capture the stars as blobs instead of tiny and crisp points of light.
Instead, turn on "live view" where it is showing the current view through your lens on your camera's LCD screen. Find a bright star or planet and zoom your LCD view in as far as it will go on that bright object. Turn your camera to infinity focus and back off the focus until the star/planet is as sharp as it can get on the LCD screen. Once you find that spot, make a mark on your lens or use tape to make sure your camera stays at the focus point.
Now take the shot!
Sign In and share them.