You are here
Finally, on to the fun stuff! Thanks for sticking around and joining us here for the third and final installment in our quest to become better outdoor photographers. First we talked about timing, inspiration and composition to lay the foundation; then we got technical in part two learning about shooting in manual mode; now we can take what we learned and use it in the real world. Here are some techniques to help you capture some of the more difficult subjects mother nature presents us with.
Long Exposure and Silky Waterfalls
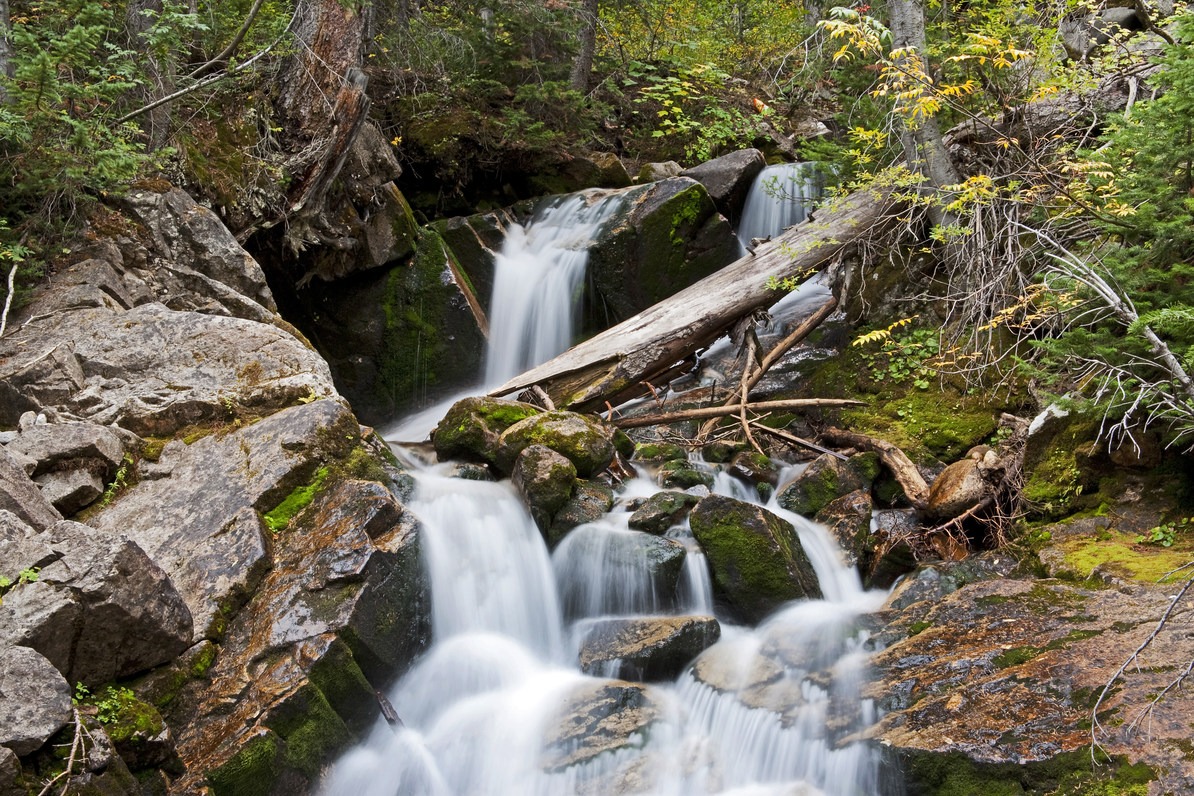
Long exposure is the basis for many outdoor photos.
To get that iconic milky-smooth waterfall look, just follow some basic concepts that we learned about shooting on manual. Turn down your ISO, get your f-stop to a high number to get the pupil small, put the camera on the tripod, and slow your shutter to an exposure of at least a few seconds. Experiment with the three controls to get dramatically different results and still properly expose the photo. You will definitely need a neutral density filter (which cuts down on the light that reaches the sensor) if you are shooting in the sunlight, but in the twilight or the shade you could get away with not having one. Long exposure, or LE, is a technique beloved by nature photographers and is not just used to shoot waterfalls. Many people attach high powered neutral density filters to extend their usable exposure times into minutes rather than seconds. This creates ethereal photos with a ton of dynamic movement. Clouds, trees and water all come to life much more vividly than with the still, static results of a fast shutter speed.
Astrophotography Basics
This field of photography is in its golden age, and people are taking phenomenal photographs at night nowadays. The first thing you need to learn and practice is how to focus to infinity, or the farthest point on which your lens can focus. You may need to establish this focal point in the daytime while your camera can autofocus easily or when you can see the distance markings on your focus ring. If you use autofocus to reach infinity, make sure you switch back to manual once you've established infinate focus. It's a must to get right, or all your shots will be blurry.
Next you will want to fully open up your aperture and turn your ISO up as high as you can without destroying the integrity of the photo with grain...maybe between 1200 and 3200, depending on your camera. Each camera is different in its high ISO capabilities, and if you have a program that reduces noise, you can go higher with fixable results. If you would like the stars to be pinpoints rather than trails. you will want to keep the exposure under 25 seconds or so. If you prefer long star trails, you will need a remote trigger with your camera set to bulb mode; you'll also want to use a lower ISO to compensate for the longer exposure. (One effective technique to reduce noise in long exposures is called exposure stacking. It is well worth looking into, but it is too complicated to cover here.) Use a tripod for longer exposures, and make sure you turn off any vibration reduction or image stabilization.
Stay away from full moons and city lights, and when it comes to shooting in the northern hemisphere, a remote area during a new moon in the summer will give you the best chance at seeing the Milky Way. You will need a lot of practice to get good at this type of photography, but there are a lot of great YouTube videos that are much more in-depth and are worth checking out.
Light Painting
One of the great weapons in the nature photographer's arsenal, light painting is essentially using some type of external lighting to "paint" the landscape during a long exposure, often at night or sunset with dramatic effect. The effect is usually created with a flashlight or a headlamp, and it is often combined with astrophotography. When properly executed, you can create some fantastic and surreal results. Some people even use candles for a mellow light so the scene is not overexposed. I recommend using warmer, yellowish lights rather than the cooler, bluer, or florescent versions. Colored gels can be added to lighting to warm up cooler lights as well as to paint the landscape in an array of color.
Sunstars and Starbursts
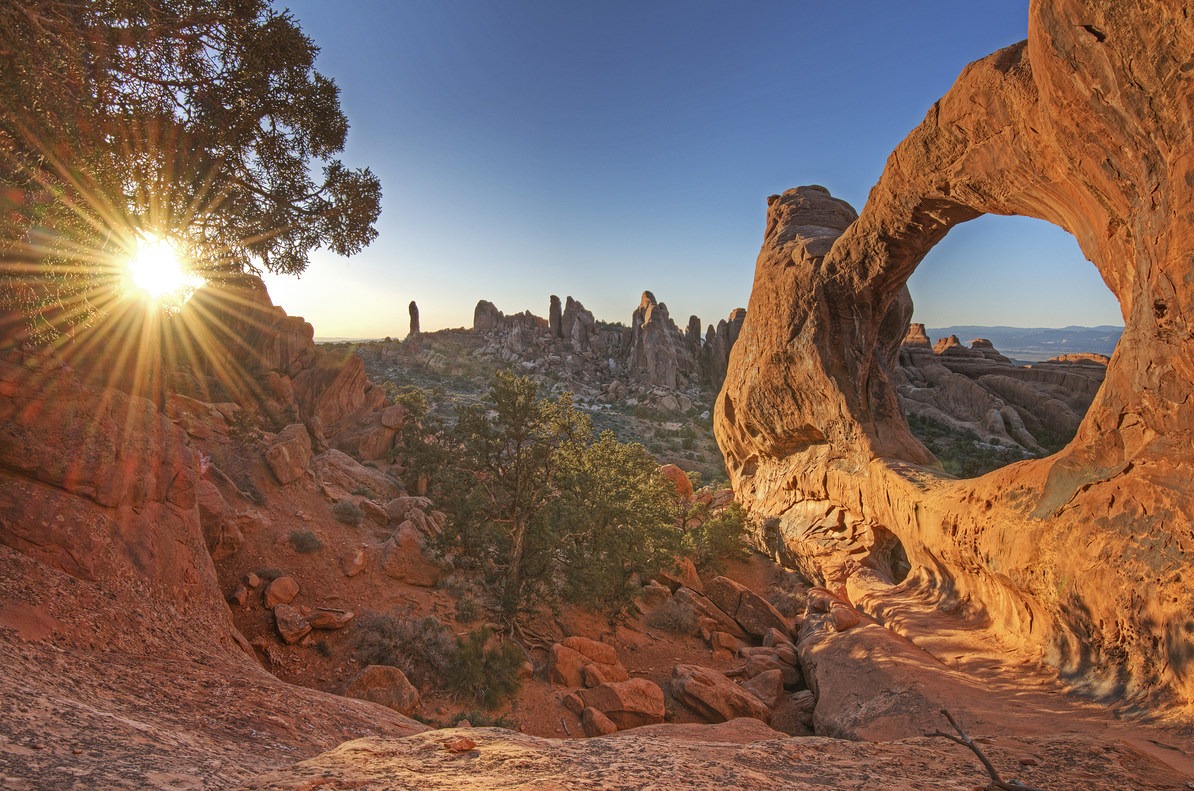
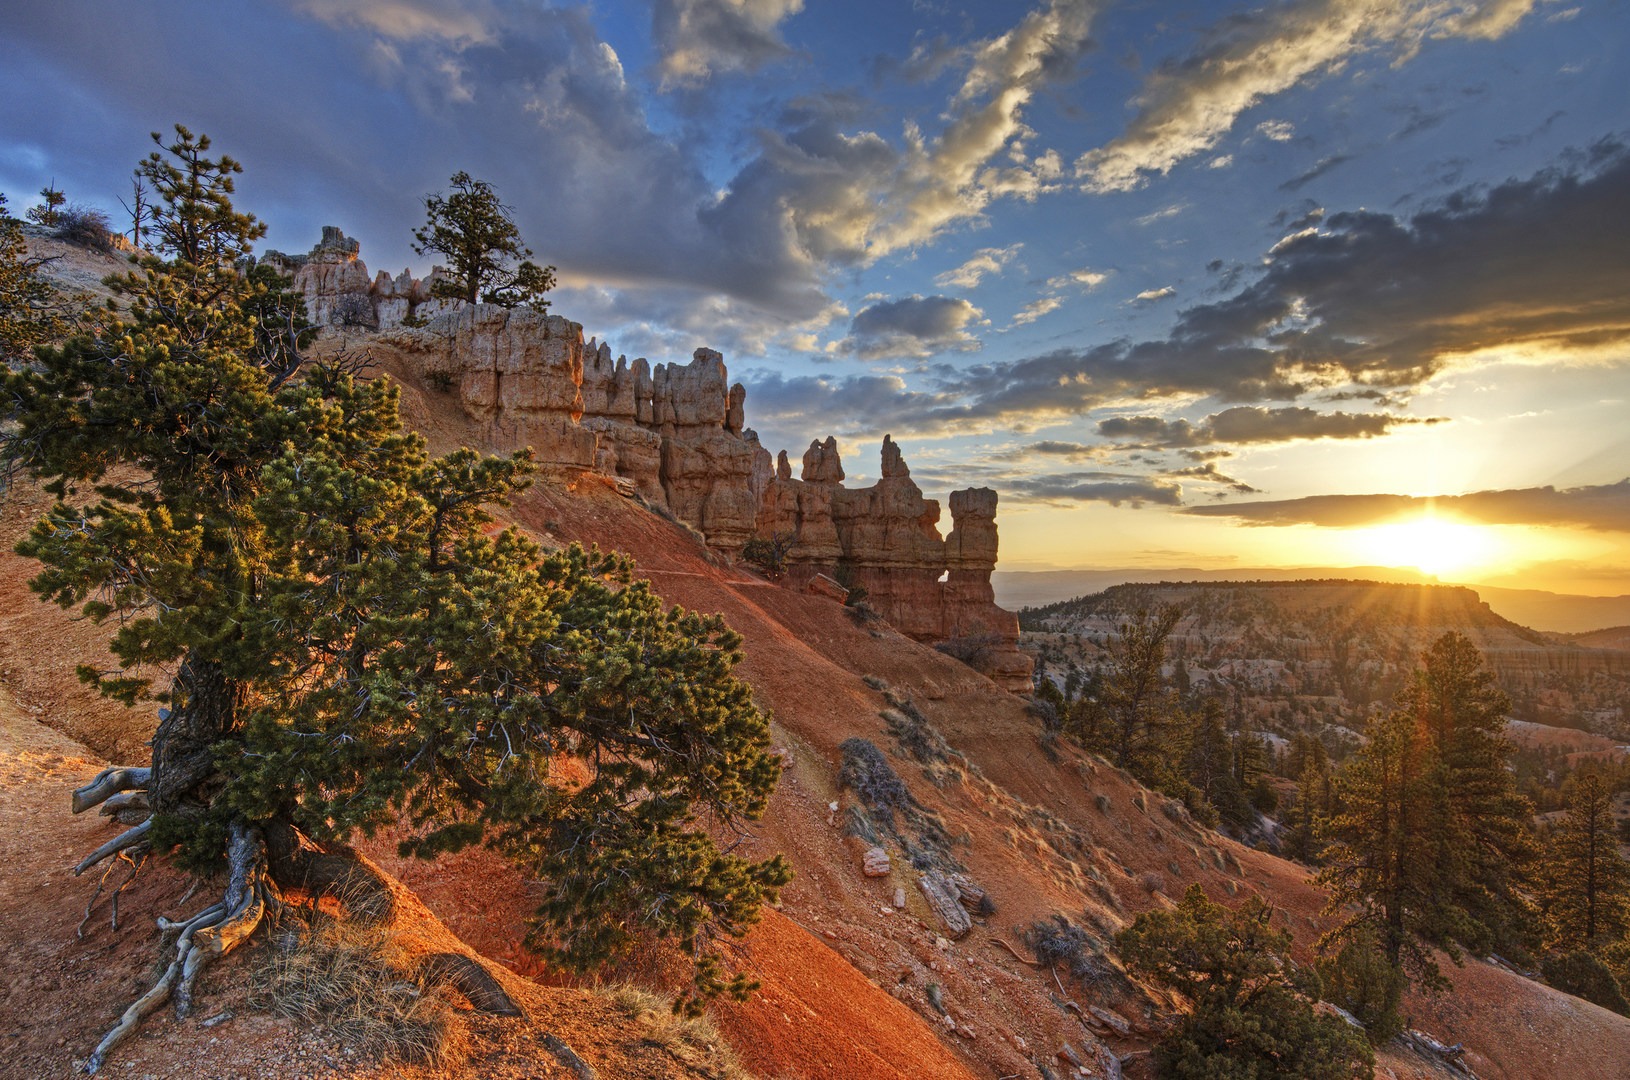
An HDR-assisted sunstar or sunburst.
This is an easy trick that every outdoor photographer should know. When you have the sun in your frame on the horizon or poking out through some trees, you can get it to form a star shape and add an extra little feature to your shot. Simply close your aperture to about an f-11 or higher and it will pinch the bright sun into a multi-pointed star. Using objects such as a tree branch to shade part of the sun also increases the burst effect compared to shooting an unobstructed sun. This effect seems to be increased by using HDR. Keep in mind the higher your f-stop, the more likely you will see any dust spots living on your lens or on your sensor. Sometimes people don't see how dirty their gear is until they try this trick. Remember to always wear sunglasses, keep the exposure brief, and don't look directly at the sun through your viewfinder.
Capturing Lightning
There are several effective ways to capture lightning, and there are even tools that can trigger your camera when the lightning strikes, but we are going to discuss the basic way most people capture lightning photos. Set your camera up on a tripod, switch to manual focus and focus to infinity, lower your ISO, and give yourself a few seconds per exposure. You'll have to adjust your aperture and ISO to give you a proper exposure given your shutter speed. An internal or external intervelometer (a timer that triggers the camera in succession) really makes this easy, and most cameras have them built in these days. After you frame your photo in the direction of your storm cloud, shoot continuously in an effort to grab the random strikes. Don't attempt to "time" the lightning by pressing your shutter button quickly after a strike or you will most likely miss it. There is potential for a strike to occur between exposures while using this continuous shooting method, of course, but if you get the system working properly you can easily catch 90% of all the lightning that occurs. Lower your shutter speed if strikes are not appearing on the thumbnail but you know you timed it right because they may be washed out from overexposure.
Hummingbirds
Definitely one of the hardest subjects to shoot in nature, these crafty little guys are a great way to test your mettle when given the chance. Turn up your ISO, open your aperture as wide as it goes, and get your shutter speed as fast as you can without underexposing your image. Hopefully the shutter will be in the thousandths-of-a-second range to get the hummingbird wings to appear still. Focusing on such a fast subject can be a challenge, and there are a few techniques you can use to achieve the best results. The first is to switch your the camera to manual focus, focus your lens at a fixed, constant distance, and hope the hummingbirds come to a specific spot such as a feeder. Secondly, you can leave the camera on manual and spin the focus ring by hand to adjust the distance as the bird moves around. Finally, you can select a continuous auto focus mode to allow the sensors to track the movement. There is no perfect solution, but practicing each technique will allow you to be ready when the hummingbirds show up.
Moving Pan
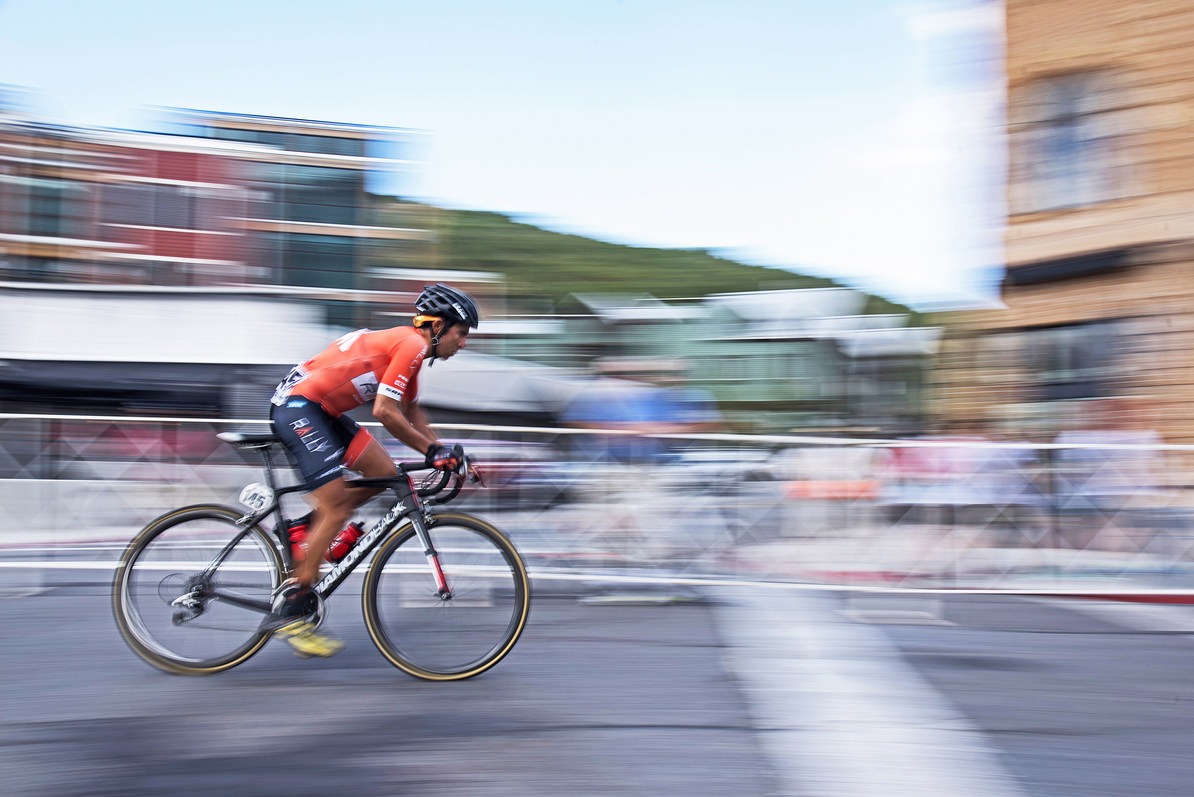
The moving pan in use.
A moving pan is a popular and technical trick to use when you want to capture a subject that is moving across a frame. Start with the same long exposure settings that you use to capture milky waterfalls (low ISO, high f-stop, and perhaps a low-powered neutral density filter). Apply settings that allow your shutter speed to be around 1/15 of a second or so. Once you have your settings you will want to track the subject's movement. For example, if you are trying to do a moving pan of a bird flying along the horizon, you would pan the camera at the same speed as the bird to track its movement. Keep the subject in the same spot in the frame by matching its speed and direction as you pan across. In the end result, the background will be the motion element and the subject appears still and in focus.
Shooting in the Falling Snow
I used to think snow falling in my scene would mean my photos were a total bust until I tried popping my on-camera flash up and started experimenting. You need a camera that can get a little wet, but most can these days. Set your aperture around f-11 and turn the flash up to full power and capture the individual snowflakes as they fall from the sky. The good depth of field and the flash combine to create a snowglobe effect. Tilt your camera back to point up to the sky to get some really dramatic versions, but be prepared to have to dry off your lens after. This is another style that takes some adjustments on the fly to get the setting right for the condition.
Using Lens Filters
This is the traditional way to manipulate your photo at the time of taking the picture rather than doing it later in Photoshop. Unlike the filters that are digital features on Instagram or Lightroom, placing a physical device on to the end of your lens gives the photo an unprocessed look. The most popular lens to use for easy landscapes is the circular polarizer. You can reduce haze, increase contrast, and peer into water with better visibility. Red colored filters do amazing things to contrast when shooting in black and white. Graduated neutral density filters are a key tool for serious landscape photographers who do not want to do HDR or heavy post-processing. For the best results, use your available physical tools and try to minimize the digital manipulation.
Bokeh Effect
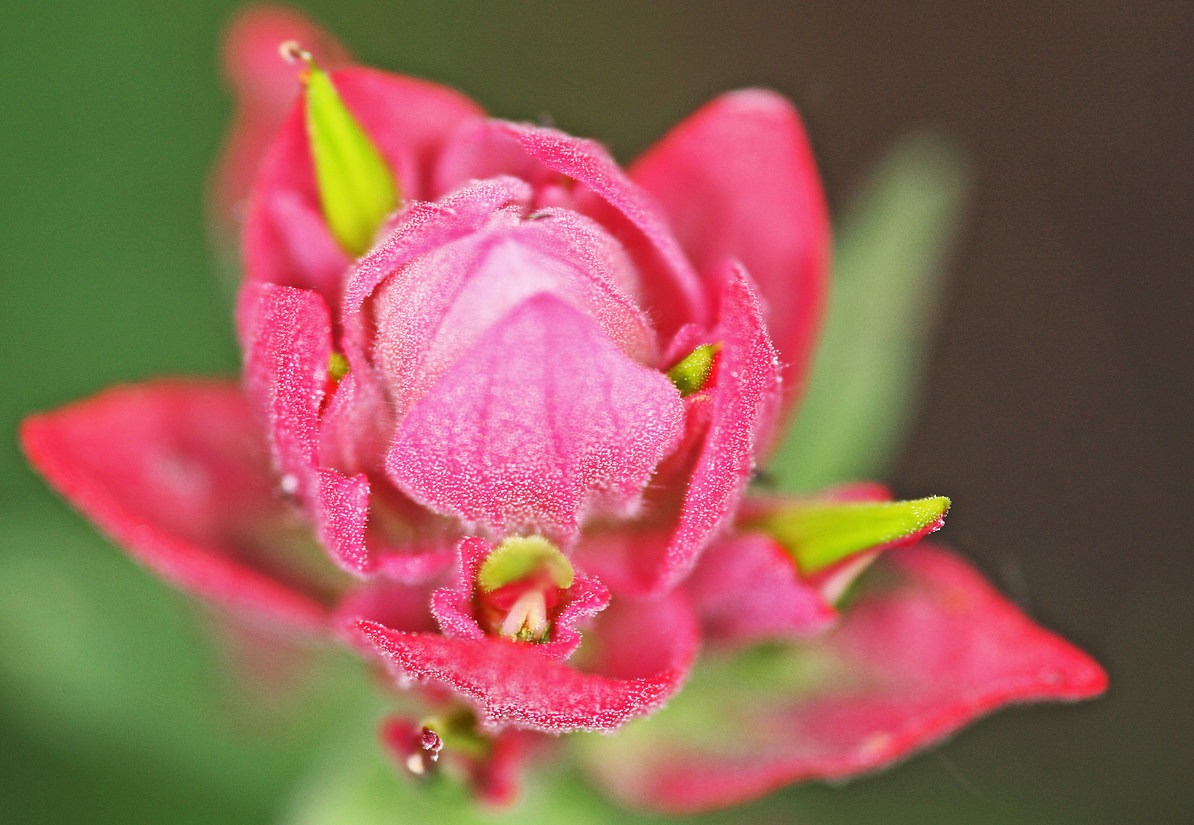
An example of bokeh while shooting macro.
Not everyone knows what this is called, but we all know what it looks like. Bokeh is when one part of an object is in perfect crisp focus and everything else around it has a soft and ethereal blur. We often see this technique used in portrait or wedding photos, but the idea works really well for close ups of flora and fauna also. Lenses that have f-stops that can go to very low numbers (wide aperture) have a stronger Bokeh effect; for instance, a lens that can shoot at f-1.8 will have a much stronger bokeh than an f-4 lens. Besides the lens, your distance from the subject and its distance from other subjects in the frame can drastically change the result as well. Learning how to properly use these elements is one of the most traditional ways to improve your photography without using digital gimmicks.
I hope these tips have been helpful for you in your photographic pursuits. Just like any topic this large, we could only cover so many aspects, so I encourage you to research other techniques or other ways to play with the ones listed above. Photography motivates me to go outside more often, and I hope it has the same effect on you. Drop me a line on Instagram @western_exposures so I can see your photos and learn from your experiences as well; I am always inspired by my fellow outdoor artists. Be safe out there, and see you on the trail!
For more Photography Essentials, be sure to see the following articles:



Comments
Sign In and share them.